
When you import goods, the real cost of a product is not just the purchase price. Freight, customs, and insurance all add to the cost of the items you receive. With container handling in Business Central, you can assign these expenses to the goods shipped on a specific container, so your item costs reflect what you actually paid.
You handle the expenses through a purchase order. Create a purchase order to the vendor that invoices you for the expense, for example the freight forwarder, the customs authority, or the insurer.
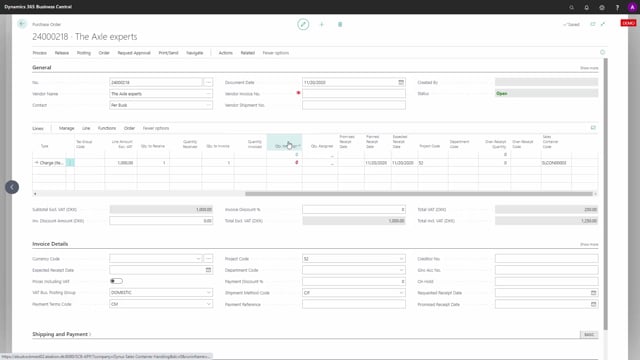
You assign the cost using the standard item charge assignment functionality in Business Central. Add the item charge line, enter the quantity and the price, and then specify the outbound container code that the expense relates to.
You distribute the cost across the related shipment lines using the standard assignment algorithms. You can suggest the item charge assignment and split the expense by whatever method you choose, so all goods on the container carry their share of the added cost.
Adding container costs through a purchase order
The container handling functionality lets you add costs on the purchase side for the expenses you incur when goods are shipped on a container. When the goods have already shipped on a container and you later receive invoices for the related expenses, you register those costs against the container.
You start by creating a new purchase order. You select the vendor that charges you for the expense. This could be the freight forwarder, the customs authority, or any other party that bills you for costs related to the container.
Using item charge assignment for freight, customs, and insurance
On the purchase order, you use the standard item charge assignment functionality. The expense line could be customs, freight, insurance, or any other cost type. You enter a price on the expense and add the quantity on the line.
After the quantity is in place, you add the outbound container code. This is the sales container that the line relates to, for example container number three. Linking the line to the container is what connects the expense to the goods that were shipped.
Distributing costs to the shipped lines
With the container code in place, you open the standard item charge functionality on the line. From the actions, you get the posted lines from the sales container ID. This shows you the related lines, so you know exactly which goods the cost should apply to.
From there, you use the standard functionality to suggest the item charge assignment. You divide the cost across the shipped lines using whatever algorithm fits your situation. The result is that you can add cost to everything related to a container, and each item carries its true landed cost.
Q&A
What kinds of costs can you assign to a container?
You can assign any expense related to the container, such as freight, customs, and insurance. These are the costs you incur for the goods shipped on the container.
How do you register container expenses in Business Central?
You create a purchase order to the vendor that invoices you for the expense, for example the freight forwarder or the customs authority, and add the expense as an item charge line.
How do you connect an expense to a specific container?
On the item charge line, you enter the outbound container code that the expense relates to. This links the cost to the sales container and the goods that were shipped on it.
How are the costs distributed to the goods on the container?
You use the standard item charge assignment functionality to get the posted lines from the sales container ID, then suggest the assignment and divide the cost across the shipped lines using your chosen algorithm.