How do you create a job planning line?
Job planning lines are the third level of the job hierarchy; we use the job planning lines to register our expectations for the job. It is also the job planning lines we use as foundation for creating sales invoices based on our job. The job planning lines can be of type both budget and billable, budget and billable. We use both budget and billable if our expected usage and expected sales are equal.
This is what happens in the video
So if for example type number two, we use budget to register our expected usage, and it’s also the billable lines which are transferred to our sales invoice.
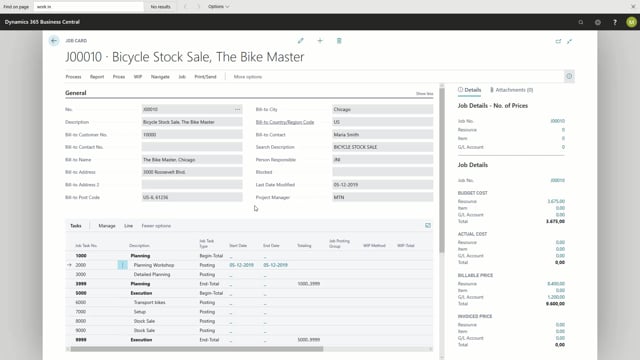
For example, if we have agreed on a fixed price, if we go to a job card in the application, we can add planning lines, we can add them via actions, or we can choose a specific job task of type posting.
Since I opened the planning lines from a job task, it will automatically inherit the job task number. Now, I can start defining my job planning lines. I need to consider the line type, as mentioned we have the type budget, billable, or both budget and billable if we’re using type number two. If I create a tight budget, this is my expected usage.
If I create a type billable, this is expected sales and this is also what will be built to the customer.
And for the both budget and billable, the budgeted and billable lines are equal to each other.
So for example the type budget so our expected usage can be used if we have some activities that we do not wish to build directly to the customer. This could be preparation time before the planning workshop.
Since the type is resource, we can choose a specific resource for the planned usage, might choose John, and expect two hours for that. As you can see the unit cost and the unit price have been populated.
This information is taken from the specific setup on the job, and if we have not made any on the job it comes from the standard setting on the resource.
Once I’ve entered quantity, the total cost and total line amount are updated. If we have agreed a fixed price for this workshop; we might bill that to the customer.
I can choose to handle this on another type. For example, if I wish to post it directly to a G/L account, and I can choose an account. If both the expected usage and sales are equal to each other, for example the actual preparation.
I can enter line of the types both budget and billable. In this case, we might have agreed that John is doing all the work in the preparation in the planning workshop.
And we might have said that it’s a day’s work.
So now we have created three planning lines. If I go back to the job card, we can see that the job tasks planning workshop, now have updated numbers for budget and billable.
We can click on the field and see the underlying records.
So this is our budget for total cost.
So we have lines of type budget, and type both budget and billable, and the sum of total cost.
We also have the total billable price. And here we have job planning lines of type billable, or both budget and billable.
And here we focus on the total line amount.
Once we start posting entries to the job, the actual total cost, and actually invoiced numbers will appear in these lists.

