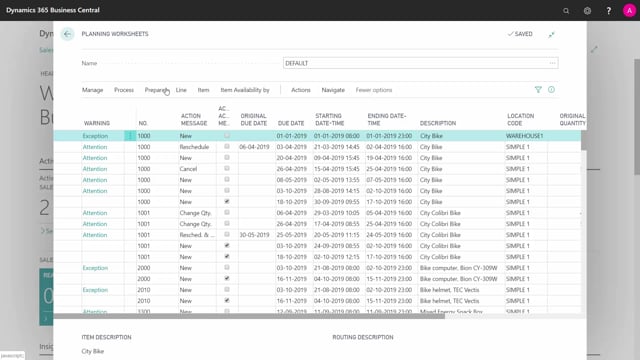

When you run an MRP batch job from the planning worksheet in Microsoft Dynamics 365 Business Central, you control the calculation through a set of fields and settings. You choose between MPS and MRP, set a starting date to protect orders you have already planned in detail, and define an ending date that determines how far into the future the system plans. The starting date creates a frozen zone, so nothing before that date gets changed.
The “Stop and Show First Error” option decides whether the planning halts on the first problem or runs through and lists all errors afterwards. If you uncheck “Respect Planning Parameters for Exception Warnings,” the system ignores order modifiers such as minimum quantity, lot size, and reorder quantity when handling safety stock breaches and other warnings. You can also limit which forecast to use and filter on item and location fields to control which supplies the planning considers.
The settings in the planning worksheet are the same as in the requisition worksheet, except for a few options that only the planning worksheet offers. Here is how to set them up.
Choosing between MPS and MRP
When you calculate a regenerative plan, you first decide whether to calculate MPS or MRP. MPS is the master production schedule, and MRP is material requirement planning. The difference between the two is its own topic, but the choice is the first thing you set when starting the calculation.
Setting the starting date and the frozen zone
The starting date determines what stays untouched. Everything before the starting date goes into a frozen zone and is not changed when you run the planning.
This is useful when you have already planned the near future in detail. If you do not want to change any orders within the next two weeks, set the starting date to two weeks from now. The planning then leaves those orders alone and only works on what comes after.
Setting the ending date to cover all demand
The ending date determines how far ahead you plan. You need to set it far enough to take all relevant purchase orders and future demands into account.
If you do not plan far enough ahead, not all demands make it into the journal, and the system cannot break them down correctly. Make sure the ending date covers the full horizon of demand you need to plan for.
Handling errors with Stop and Show First Error
The “Stop and Show First Error” option controls how the planning reacts to problems. If you select it, the planning stops the moment it hits an error, for example when a bill of material is not certified or an item is blocked.
If you do not select it, the planning runs all the way through and gives you a list of errors afterwards. Either way, you need to fix the errors and replan, because the demands will not break down correctly until the problems are resolved.
Using forecast in the planning
If you work with forecasts, you select the forecast you want to use directly in the batch job. By default, the system uses the forecast from today and forward, or from the last forecast period you are in and forward.
You can also limit the forecast to start from a future date. For example, you can exclude the forecast for the next month and only include the forecast before or after that period.
Respecting planning parameters and order modifiers
The “Respect Planning Parameters for Exception Warnings” field decides whether the system honours your order modifiers in certain situations. If you do not checkmark this, then in cases such as a safety stock breach or other warnings in the journal, the system ignores the order modifiers on the item card.
That means the minimum quantity, lot size, reorder quantity and similar settings will not be respected when the warning occurs. Whether to checkmark this depends on what you want the system to do for you in those situations.
Filtering on items and locations
You can filter on all the fields from the items, location filters and more. This lets you decide exactly which supplies the system takes into account when it runs the planning, so you can narrow the calculation to the part of your inventory you want to focus on.
Q&A
What is the difference between the planning worksheet and the requisition worksheet for MRP?
The settings are the same in both worksheets, except for a few options that only the planning worksheet offers.
What does the starting date do in an MRP batch job?
Everything before the starting date goes into a frozen zone and is not changed during planning. Set it to protect orders you have already planned in detail, for example two weeks from now.
How far ahead should I set the ending date?
Set it far enough to bring all future purchase orders and demands into the journal. If you do not plan far enough ahead, the system cannot break the demands down correctly.
What happens if I do not select Stop and Show First Error?
The planning runs all the way through and gives you a list of errors afterwards instead of stopping at the first one. You still need to fix the errors and replan.
What does Respect Planning Parameters for Exception Warnings control?
If you do not checkmark it, the system ignores order modifiers such as minimum quantity, lot size and reorder quantity when handling safety stock breaches and other warnings in the journal.
Can I limit which forecast the planning uses?
Yes. You select the forecast and can set it to start from a future date, for example excluding the next month and only including the forecast before or after that period. By default it runs from today or the current forecast period and forward.