
If you work with demand forecasting in Microsoft Dynamics 365 Business Central, you can set up an automatic selection that filters items based on any field on the item table. The selection updates itself whenever your data changes, so items move in and out of the forecast automatically when they meet or stop meeting your filter criteria.
You build the automatic selection in the flexible forecast by defining a source table, a source field to filter on, and a destination field that links back to the item number. When the item table is your source table, you must still add a line where the destination field number points back to the item number on table 27.
You can combine several filter lines in one selection. For example, you can filter on specific vendor numbers and on a unit cost up to and including a chosen value at the same time.
Once the selection is in place, you update the forecast to apply it. If an item’s data changes so it now matches the filter, it appears in the forecast automatically the next time you update.
What an automatic selection does in the flexible forecast
An automatic selection lets you define filter criteria once and have the forecast keep itself up to date. Instead of manually adding and removing items, you set up the rules and the system picks up the right items every time you update the forecast.
In this example, the goal is to select items based on two criteria: a set of specific vendor numbers, and a unit cost that is less than or equal to three. Without the unit cost filter, around eight items would qualify. With both filters applied, the list narrows to four items.
How to create the selection in the flexible forecast
Start in the flexible forecast under the view that shows the period per item. From there, drill down and create a new selection, and give it a name.
This is where it gets a bit more technical, because you have to configure the automatic selection correctly.
First, set the source table. In this case, that is the item table, which is table 27. You can drill down and look it up if you do not remember the number. This tells the system that you are filtering on the item table.
Setting up the filter lines
Next, you add filtering lines on the item table. The first line defines the field you want to filter on. Choose the source field vendor number from the item table, and enter the vendor numbers you want to include in the filter.
You also need at least one line with a destination field number. The destination field is what the system matches against the item number when it filters. Because the source table is the same as the destination table here, this step feels a little awkward, but it is required. You insert the line by entering the line number, and set it so that the item key (the number) equals the destination field number on table 27, which is also the number.
This destination line makes more sense in scenarios where the item table is not the source table. In this case, with the item as both source and destination, the setup simply links the filter back to the item number. Once that is in place, the selection brings in all items matching the chosen vendors.
Adding a second filter line for unit cost
To narrow the selection further, add another selection line. Click the line number, find the field unit cost, and add a filter so the value must be up to and including three.
With both lines in place, the selection now combines the vendor numbers and the unit cost limit. When you update the forecast, it shows exactly the items you want.
How the selection updates automatically
The real value shows when your data changes. After applying both filters, the forecast displays four items.
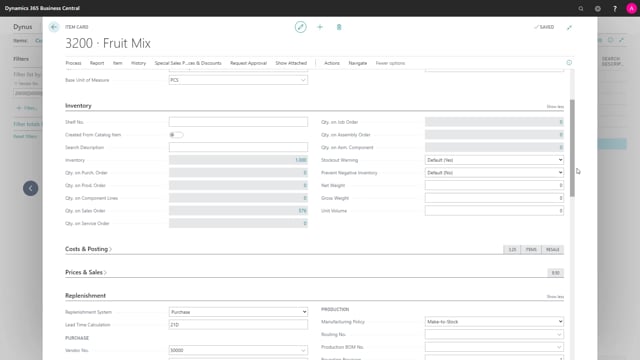
Now take an item that is not currently in the filter, for example item number 3200, and change its unit cost to 2.8. The item now meets the unit cost criterion. When you go back to the forecast and update it, the item appears on the list.
That is the point of an automatic selection. You set up the filter rules once, and the list expands and contracts on its own as your item data changes.
Q&A
What is an automatic selection in the flexible forecast?
It is a set of filter rules you define once in the flexible forecast. Instead of manually adding and removing items, the forecast picks up the items that match your criteria and updates itself automatically when your item data changes.
Which fields can I filter on in an automatic selection?
You can filter on any field on the item table. In this example, the selection filters on vendor number and on unit cost, but the same approach works for other fields.
Why do I need a destination field number when the item table is the source?
The destination field is what the system matches against the item number. Even when the item table is both source and destination, you need at least one line where the destination field number points back to the item number on table 27. It feels awkward in this scenario, but it is required for the selection to work.
How do I combine more than one filter criterion?
Add a separate selection line for each criterion. Click the line number, choose the source field, and enter the filter value. For example, one line for vendor numbers and another line for a unit cost up to and including three.
What happens when an item’s data changes after I set up the selection?
If the item now matches the filter, it appears in the forecast the next time you update it. For example, changing an item’s unit cost to 2.8 brings it into a filter set to a unit cost up to and including three.